Friday 25 December 2015

Practical 6: Seagrass Culture

Introduction
Halodule pinifolia is a needle-like sea grass often seen in large shore where it is commonly found on the seaward side of sand bars. The sea grass is really hardy plant where it can tolerate high disturbance in the natural. In this practical report, we would like to test and observe the condition of H.pinifolia if the sea grass is cultured indoor. The sea grass, seawater sample and the substrate was collected at Teluk Kemang, Port Dickson and was brought back to UPM, Serdang. In order to culture it in the lab, similar condition and water parameter as in the natural ecosystem was provided. Thus, the sea grass was monitored gradually for its growth and performance.

Objective
To observe the characteristics and morphology of the selected sea grass.
To be able to successfully culture sea grass in an indoor aquarium.
To observe the life cycle of sea grass.

Materials and Methods

1. Seagrass sampling
The selected sea grass was Halodule pinifolia, which was found in abundance at Teluk Kemang, Port Dickson. The area in which the specimen was taken was a sandy substrate. H. pinifolia was easily identified by its hair like leaf that can be seen on the surface of the sand in low tide. A few samples was carefully taken by scooping the sand along with the sea grass to avoid damaging its submerged rhizome. Samples was placed in a plastic bag and brought back to the lab.
Image 1: Collection of sea grass sample at Teluk Kemang.

Image 2: Hair-like leaf of Halodule pinifolia.

Image 3: Scooping the sample along with its substrate to avoid damaging the rhizome.
2. Preparing Culture Equipment
Equipments used was two sieved basket(Small), a fine mesh placed on the basked, A plastic aquarium and aeration. A single sample was placed in a prepared basket along with its soil and toothpicks was placed on each end of the rhizome to record growth. Once prepared, each basked is placed into an aquarium filled with seawater and provided enough aeration and sunlight.
Image 4: Preparing basket with fine mesh sieve to hold substrate.
Image 5: Placing collected substrate onto each basket.
Image 6: Cleaning sea grass sample from stones and debris.

Image 7: Measuring selected sea grass sample before planting onto prepared substrate.

Image 8: Completed culture tank for sea grass.
3. Sea grass growth measurements
Starting from day one, the growth of rhizome is measured and recorded weekly. Additional experiment was done by removing all the leaves of a sea grass sample to observe the growth of new leaves. The results was recorded and shown in the results section.

Image 9: Measuring the growth of new leaves.

Image 10: Measuring the growth of new leaves in each sample.
Image 11: Extra sample of sea grass placed without substrate shows this species is able to grow easily with suitable water parameters.
4. Water Parameters
Water parameters was taken to observe the water quality in which the sea grass has been growing on for a few weeks. The DO, pH, Ammonia and Salinity was taken and recorded.

Image 12: Taking DO reading using a DO meter which was 8 mg/l,

Image 13: Checking salinity with a refractometer.
Image 14: Checking ammonia using an ammonia test kit.
Image 15: Ammonia reading for the sea grass culture was close to 0.

Results

Basket
Seagrass (row)
Before (cm)
(29/9/15)
After (cm)
(1/10/15)
A
I
5.0
5.1
II*
6.5
6.7
B
I
5.3
5.5
II
5.5
5.6
III
9.0
9.3

*the leaves are picked to observe a growth of new shoots

Discussion
Halodule pinifolia are widely known as a very tough plant able to withstand a very adverse condition. Therefore the plant can easily grow anywhere including in our tank. The plant shows continuous growth even after the experiment period where they get rid of old leaves and grow the new one. One of the basket is removed after a while to observe to have the plant in its optimum condition. The water level in the tank is also kept in check where it is refilled when it is evaporated, There is one way to keep the plant grow at its best which is to place the basket at the depth same as the water tide timetable at its origin.

Conclusion
Halodule pinifolia was successfully cultured in an indoor room (in the lab). The length of the leaf seems to be increasing. There was no sign of yellowish or dead parts from the seagrass even with no sunlight expose to it. Perhaps the lighting in the lab is enough for it to survive. Moreover, new shoots starts to emerge and we also tested the seagrass without any substrate to it. Surprisingly, it does live, provided the water parameter is suitable for it to grow which is somewhat similar as in the natural environment.

References


  • http://www.wildsingapore.com/wildfacts/plants/seagrass/halodule.htm

Thursday 24 December 2015

Practical 7: Aquatic Macrophyte Tissue Culture

Introduction
Our ecosystems are being polluted day by day and there are less people out there care about it, it is the main cause that our sensitive plants died because they are unable to cope with the change. Aquatic systems continue to be among the world’s most threatened ecosystems (Zedler and Kercher, 2005). The threats will lead the aquatic biota become increasingly stressed, resulting in reduced growth and reproduction (Sim et al., 2006) and ultimately death, leading to a decline in species richness (Hart et al., 1990). So, in order to preserve them as well as wanting to grow faster, tissue culture was introduced.

Objective
To successfully culture Anubias nana sample using only leaf cuttings on agar media.

To observe the growth of leaf sample on MS media.

Materials and Method
Our explant are Anubias nana.
In the laminar flow, the bottle are sterilized and mouth of the medium bottle before pouring. 
 The Murashigae and Skoog(MS) agar are poured into sample bottle and let it cooled down.

 Explant are cutted 1cm each, 4 pieces of leaves are cutted.

 The explants are washed with distilled water and 2 to 3 drops of tween 20 (Soap like)

 Explants are shaken for 3 minutes without stopping and the bubble are presented.
 After that. rinsed with distilled water for 3 minutes (shake continuously).
Here is our model of the shaking mechanisms.
Washed the explants with 70%, 50%, 30% and 10% of chlorox for 1 minute for each treatment and rinsed with distilled water for 3 minutes ( with continuous shaking) 
 Explants that are sterilized are kept in the bottle to prevent contamination before use.
 In the laminar flow,  explants are washed with 70% ethanol ( shake for 3 minutes), then rinsed with distilled water (shake for 3 minutes as well).

 The explants are then transferred to on top of tissue paper to cut the dead parts.
The dead parts which are in yellow colors.

 
The explants are planted on the surface of the agar.
4 of the explants are successfully planted.

Results
After 2 weeks, It was observed that most sample has a growth of fungus and bacteria which was due to contamination during handling which can be seen in sample TP1, TP2 and TP3 with a high growth of contamination on TP2. TP1 on the other hand had minimal contamination but no difference was observed. However, TP4 was successful with no contamination and developing red edges on the area it was cut which will soon develop into a callus.
Image : TP2 with great degree of contamination.
Image : Shows the various contamination which occur on TP1, TP2 and TP3 with TP1 having least contamination.

Image : TP4 free from any contamination and red edges shows the future development of callus.

Discussion
Aquatic plants can take up excessive nutrients and also play a crucial role in creating a favourable environment for a variety of chemical, biological and physical processes that contribute to the nutrient removal and degradation of organic compounds (Chong et al, 2004)Tissue culture are widely use might because harvesting of aquatic plants from their natural habitat will become a threat to the species richness (Lauzer, 2004). Besides, tissue culture have advantage such as good quality of planting materials which disease and virus free at a competitive price while conserving aquatic plants in their natural habitat. Large scale plant production also can be programmed and preservation of plant species in vitro is also possible (Yapabandara and Ranasinghe, 2006), in addition, Many tissue cultured water plant species show a more bushy growth with more adventitious shoots, qualities that many will appreciate (Christensen, 1996). However tissue culture must be culture in a sterile environment as you can see from TP1, TP2 and TP3 which have bacteria contamination, it might be cause by infection during preparation or the seal are not tight enough, we are lucky to have TP4 uncontaminated and the red edges shows that the explants are growing. 

Conclusion
Tissue culture can be hard to culture sometimes due to the cleanliness of the air in the environment and even laminar flow could not prevent it, if there are no contaminations, high chances are the explants going to grow.
Reference

Chong, Y. X., Hu, H.Y. and Qian, Y. (2004). Advances in utilization of macrophytes in water pollution control, Tech. Equip. Env. Pol. Contr. 4 : 36–40.

Christensen, C. (1996). Tropical aquarium plants Denmark. Aquaphyte online: University of Florida. http://www.tropica.dk. Cited 10 January 2008. 

Hart, B. T., Bailey, P., Edwards, R., Hortle, K., James, K., McMahon, A., Meredith, C. and Swadling, K. (1990). Effects of salinity on river, stream and wetland ecosystems in Victoria, Australia. Water Res. 24, 1103–1117. 

Lauzer, D. (2004). In vitro embryo culture of Scirpus acutus. Plant Cell, Tissue and Organ Culture 76: 91-95.

Sim, L. L., Chambers, J. M. and Davis, J. A. (2006). Ecological regime shifts in salinised wetland systems. I. Salinity thresholds for the loss of submerged macrophytes. Hydrobiologia 573: 89–107.

Yapabandara, Y. M. H. B. and Ranasinghe, P. (2006). Tissue culture for mass production of aquatic plant species. 

Zedler, J. B. and Kercher, S. (2005). Wetland resources: status, trends, ecosystems services, and restorability. Annu. Rev. Environ. Resour. 30: 39–74.

Tuesday 22 December 2015

Entrepreneurship Project using Aquatic Macrophytes


Product 1: Mini Aquascape

Our plan was to make a small and affordable aquascape where others could enjoy their own small ecosystem. We managed to get some aquarium dirt and collected Cabomba sp. to be placed in our small cylindrical container. To make one of these samples, the soil must be prepared first. About 2 inches of soil is placed into the container and dechlorinated water is poured until desired water level. The container is then left for 1 week before any plants is planted. A hardy freshwater plant is selected and planted into the soil and sunlight is provided 12h per day. Once everything is stable, a suitable fish species such as the guppy is placed into the container and the whole mini aquascape is completed. Production cost: RM5, Sold for RM10

Image 1: Phytoteam Mini Aquascape.
Product 2: Herbarium Bookmark
In this product, we decide to sell preserved aquatic plants that can be enjoyed by everyone with a very low cost. Each aquatic plants was carefully selected and cleaned before drying. After about 7 days, the samples can be collected and made into bookmarks. Completed samples comes along with their scientific name for better identification. Production Cost: RM0(using supplies that was already provided) Sold for RM 2 each

Image 2: Phytoteam Herbarium Bookmark.

Product 3: Herbarium Collage
In this product, we aim to add some artistic value using herbarium samples of aquatic macrophytes and turning them into simple piece of art. Production cost: RM5 Sold for RM10 and RM25.

Image 3: Our finished product sold for Rm25.

Product 4: Moss Grafitti
This product was a pilot project to observe whether making a moss graffiti is possible using the same ingredients from the net. The turn out was satisfying however, we was not able to properly maintain the sample with daily spraying which resulted in dried samples. In the future, a proper moist condition should be provided to allow the moss to grow.
Image 4: Cleaning collected moss from stones and debris.
Image 5: Preparing media with 1 part salt, 2 parts brown sugar.
Image 6: Adding 300ml of milk into the media.
Image 7: A cup of cleaned moss is added into the mixer.
Image 8: The media and moss was mixed thoroughly but not finely as this may damage the moss.
Image 9: Prepared media with moss that is ready for painting.
Image 10: Spreading of moss media onto wood surface and left to grow for a week.
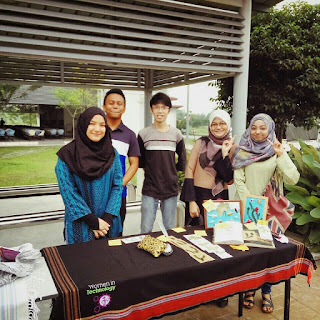
Product Marketing on 17 December 2015 under Flora Aqua Arts Day 2015.

Image 11: Setting up our booth.
Image 12: Getting ready for students and lecturers to come by,

Image 13: Promoting our products and exposing students and lecturers about the world of  aquatic flora.
Image 14: Some products for sale including Herbarium bookmarks and herbarium collages.


Saturday 28 November 2015

Practical 4 : Microalgae Growth Measurement Methods

Introduction
Density of microalgae is widely tested all around the world as it is important as an indicator for a lake or sea to be determine whether the density is too much ( nutrient overload) or too less ( lack of nutrient ) which will lead to the healthiness of the sea. There are several method of calculating the density, for example Dry Weight method ( used to determine the density by weight ), Dilution method ( by using the haemocytometer to count the microalgae) and the most expensive method which is spectrophotometer ( by detecting the light reflection by chlorophyll a ).

Objectives
To determine the density of the stock culture

To determine whether which method has the highest accuracy

Materials and methods
A) Dry Weight method
Picture 1: Amphora sp

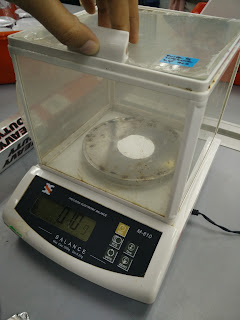
Picture 2: Weighing the filter paper (initial weight)


Picture 3: Filtered an exact volume on pretared glass microfibre filters by using a bilchner setup connected to a vacuum pump (Control filters : Seawater)


Picture 4 : The filtered paper are washed with ammonium formate (0.5M) to remove salts. 


Picture 5: The filtered paper are sealed in the aluminium foil and dried at the oven at 100 degree Celsius for 4 hours to volatilize the ammonium formate

*Repeat the steps from picture 2 till picture 5 by using the Amphora sp 

*After 4 hours, the filtered paper are weighted.

B)Chlorophyll Analysis method
Picture 6: 50ml sample are filtered through the pretared glass microfibre filters. 
       Add 3 to 5 drops of MgCO3 to the sample as it is being filtered.

Picture 7: Edges of filter which are not coated with residue being trimmed away. 


Picture 8: The filter with 5ml acetone are grinded for 1 minute. After that, 5ml more of acetone are being added and grinded for another 30 seconds. 

Picture 9: Extract are done and refrigerated in the dark for an hour.
Picture 10: After an hour, the sample was centrifuged at 3000rpm for 10 minutes.
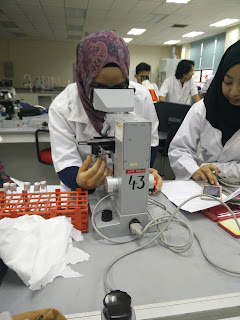
Picture 11: The absorbance of the sample extract are measured by Spectrophotometer at 750nm, 664nm, 647nm and 630nm.

Picture 12: Glass Cuvettes.

Picture 13: Delicate Task Wipers

Picture 14: The extract are inserted by using a droplet at the volume of 5ml into the Cuvette.

Picture 15: The Cuvettes are wiped before inserted into designated place

Picture 16: The Cuvettes are inserted into the spectrophotometer.

Picture 17: The program are set and ready to go.

Picture 18: Results are obtained.


C) Dilution method
Picture 19: 6 test tube are prepared

Picture 20: Stock culture are inserted in 5 test tube which are in different volume, 1 ml, 2 ml, 3 ml, 4 ml, and 5 ml.
*5ml stock culture does not need to be filled with seawater*
Another 1 test tube are filled in with 5ml of seawater as constant, the rest are filled with seawater until 5 ml of the total volume


Picture 21: Test tube are labeled

Picture 22: Haemocytometer are used to count the numbers of Amphora under microscope.

Results

1)Estimation of Dry weight
Weight(g)
Filter with seawater
Filtre with microalgae
Before
0.1
0.1
After
0.10
0.11

2) Chlorophyll analysis
Wavelength(wm)
630
647
664
750
Absorbance
0.0432
0.0567
0.0431
0.0204

3)Optical density analysis
%
Cell/ml
OD
0%
0
0
20%
9 000
0.0732
40%
150 000
0.1622
60%
260 000
0.2689
80%
360 000
0.2919
100%
1 000 000
0.3775


Discussion
Due to the natural characteristic of  Amphora sp. to be a benthic microalgae, it is common for it to easily clump together and descend to the bottom of a container which may affect a reading when the sample is not continuously mixed or stirred. In each method, the Amphora sp. culture is constantly stirred to achieve a more accurate result.